Simple Sourdough Recipe – Printable Cheat Sheet
Baking sourdough bread changed my kitchen. It turned it into a place of creativity. The first time I made a golden, crusty loaf, I felt connected to an old tradition.
Starting your sourdough journey is easy. This recipe is perfect for beginners or those who want to improve. You can make amazing bread at home with just a few ingredients and patience.
The cheat sheet you’ll find is very helpful. It makes sourdough easy to follow. You’ll learn about fermentation and how to get a perfect crust.
Sourdough is more than bread. It’s a way to connect with bakers from the past. Your sourdough adventure is starting now. It’s as rewarding as the first bite of your homemade bread.
Table of Contents
Understanding the Basics of Sourdough Bread Making
Starting with a simple sourdough bread recipe is exciting. It’s more than just a tasty treat. It’s a way to connect with old bread-making ways.
Making simple sourdough bread is special. It’s different from regular bread because of its unique fermentation and ingredients. These things turn simple flour and water into a special loaf.
What Makes Sourdough Different from Regular Bread
Sourdough bread is special for many reasons:
- It tastes deeper and more complex
- It uses natural fermentation
- It’s easier to digest
- It has less gluten than commercial breads
The Science Behind Fermentation
Fermentation is key in sourdough bread. Wild yeasts and good bacteria create a special environment in the dough. This process makes the bread healthier and easier to digest.
| Fermentation Stage | Key Characteristics |
|---|---|
| Initial Fermentation | Develops flavor and increases nutrient availability |
| Long Fermentation | Enhances bread’s digestibility and texture |
| Wild Yeast Activity | Creates unique tangy flavor and soft crumb |
Essential Tools and Equipment
To begin your sourdough bread making, you’ll need some important tools:
- Large mixing bowl
- Kitchen scale
- Dutch oven or baking stone
- Banneton proofing basket
- Sharp scoring knife
With the right tools and knowledge, making sourdough bread is a fun adventure. You’ll soon make artisan-quality bread in your kitchen.
Creating Your Sourdough Starter from Scratch
Starting your sourdough journey begins with a living starter. This mix of flour, water, and wild yeasts turns simple ingredients into a bread-making foundation.
To make your first sourdough starter, you need just two things:
- Unbleached all-purpose flour
- Filtered water at room temperature
The process needs patience and care. Mix equal parts flour and water in a clean glass jar. Consistency is key in your sourdough recipe. Cover the jar loosely and let it sit at room temperature.
Your starter will go through stages:
- Day 1-3: Minimal activity
- Day 4-7: Bubbles start to form
- Day 7-14: Active fermentation
Look for signs of a healthy starter:
- Consistent bubbling
- Slight tangy smell
- Doubling in size in 4-8 hours after feeding
Feed your starter daily by discarding half and adding fresh flour and water. In two weeks, you’ll have a strong starter for your first sourdough recipe.
Pro tip: Keep your starter at 70-80°F for best growth.
Essential Ingredients for Simple Sourdough Recipe
Making a tasty french bread sourdough starts with knowing the key ingredients. These ingredients turn a simple recipe into a special treat.
Your simple sourdough recipe needs a few important parts to work magic in your kitchen. Let’s look at the basic ingredients that will make your bread-making better.
Types of Flour to Use
Choosing the right flour is key for sourdough success. Each flour adds its own special touch to your bread:
- Bread Flour: High protein for strong gluten
- Whole Wheat Flour: Nutty flavor and extra nutrition
- Rye Flour: Better fermentation and complex tastes
Water Temperature and Quality
Water is very important for your french bread sourdough. Its temperature and purity affect how it ferments and feels.
- Ideal water temperature: 70-80°F
- Best results with filtered or spring water
- Avoid chlorinated water to help fermentation
Salt and Its Role
Salt does more than just add flavor in your simple sourdough recipe. It strengthens gluten, controls fermentation, and deepens the taste.
Use high-quality sea salt or kosher salt for the best sourdough. A little salt makes a big difference in a perfectly balanced loaf.
Mastering the Perfect Hydration Ratio
Understanding hydration is key when making your simple sourdough bread recipe. Hydration is the water-to-flour ratio in your dough. It greatly affects your bread’s texture and quality.
Different hydration levels make your bread unique. A low-hydration dough (60-65%) is denser and tighter. High-hydration doughs (75-80%) are light and airy, loved by sourdough fans.
- Low hydration (60-65%): Firmer dough, easier to handle
- Medium hydration (65-70%): Balanced texture and manageability
- High hydration (75-80%): Lighter, more open crumb structure
Beginners should start with a medium hydration of 70%. This balance is great for both workability and texture. It’s also forgiving for newbies during mixing and shaping.
Pro bakers suggest using a digital kitchen scale for accurate hydration. It’s crucial for consistent results in your sourdough making.
The secret to great sourdough is understanding how water transforms your ingredients.
Try different hydration levels to learn more about sourdough bread making. Each change brings you closer to your ideal loaf.
Step-by-Step Mixing and Folding Techniques
Mixing and folding are key steps in making sourdough bread. They turn simple ingredients into a beautiful loaf. Your beginner sourdough recipe needs these steps to get flavor and structure right.
Learning to mix and fold is crucial. It makes your loaf light, airy, and full of taste. Here are the main techniques for your sourdough journey.
Initial Mix and Autolyse Technique
The autolyse process is a big help for your sourdough. It involves:
- Combining flour and water
- Letting the mixture rest for 30-60 minutes
- Allowing enzymes to break down proteins
- Developing gluten structure naturally
Stretch and Fold Method
The stretch and fold technique strengthens your sourdough. It’s a better way than kneading to get a light crumb.
| Technique | Purpose | Duration |
|---|---|---|
| Gentle Stretch | Align Gluten Strands | First 2 hours |
| Folding | Build Dough Strength | Every 30 minutes |
| Rest Periods | Allow Gluten Development | 15-20 minutes |
Building Gluten Structure
Gluten development is key for your sourdough. Gentle handling and patience are important. They help make a strong, elastic dough that rises well.
“Good bread is the most fundamentally satisfying of all foods.” – James Beard
Bulk Fermentation Guide for Beginners
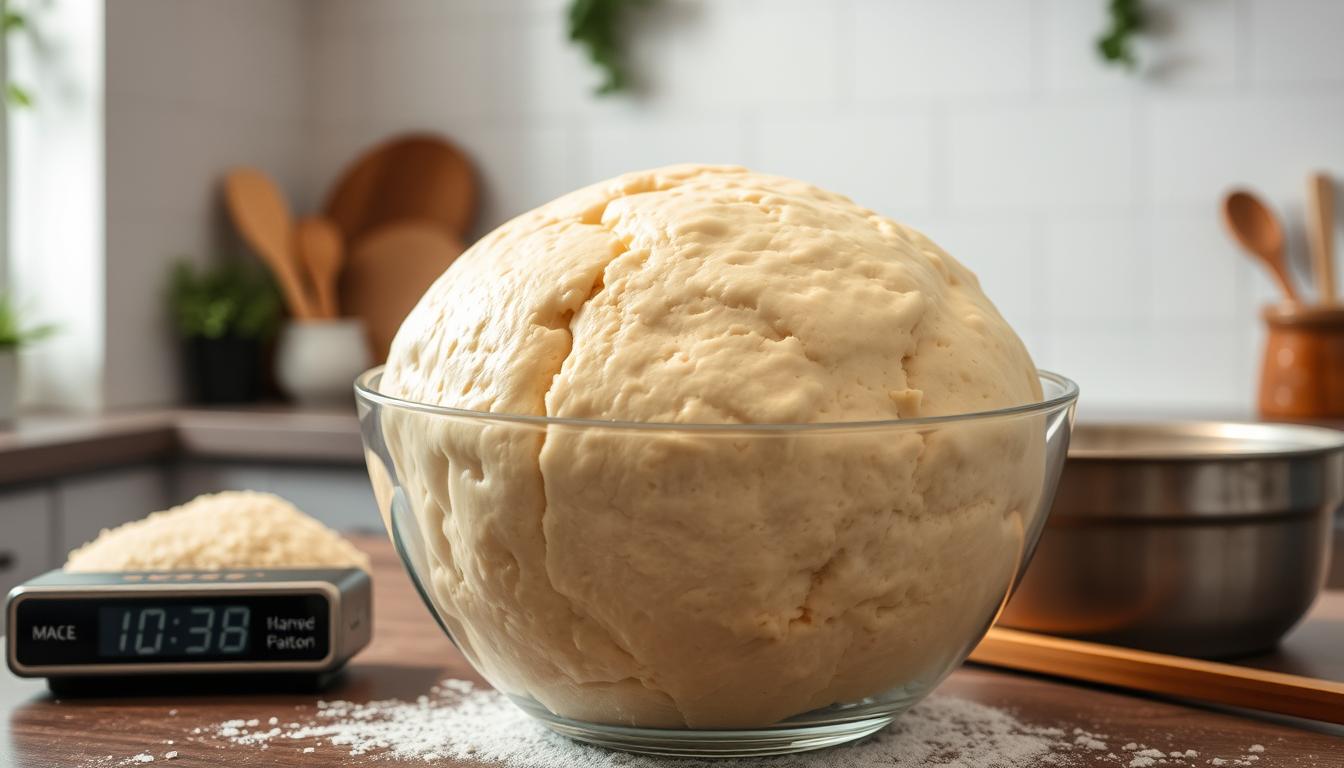
Bulk fermentation turns raw ingredients into a tasty, airy bread. It’s when your dough gets its complex flavors and rises. This makes your sourdough bread special.
Learning about bulk fermentation is key to making great sourdough. You let your dough rest at room temperature. This lets wild yeast and bacteria work their magic.
- Ideal bulk fermentation temperature: 70-75°F
- Typical duration: 4-6 hours
- Key signs of proper fermentation:
- Increased volume
- Bubbles throughout dough
- Slight jiggle when container is moved
Your dough’s behavior in bulk fermentation depends on several things. Warmer temperatures make it ferment faster. Cooler temperatures slow it down.
| Temperature Range | Fermentation Impact | Recommended Action |
|---|---|---|
| Below 65°F | Slow fermentation | Extend fermentation time |
| 70-75°F | Optimal fermentation | Follow standard recipe timing |
| Above 80°F | Rapid fermentation | Reduce fermentation time |
Pro tip: Use a clear container to track your dough’s progress during bulk fermentation. This helps you understand how your simple sourdough recipe develops over time.
Look for signs like more volume and surface bubbles. These show your dough is ready for the next step in making sourdough.
Shaping Your Sourdough Loaf Like a Pro
Learning to shape your sourdough sandwich loaf can change your baking at home. The right steps will make your bread look like it was made by a pro. It will have the perfect shape and feel.
Shaping a sourdough sandwich loaf takes time and practice. You want to make the dough tight. This helps it rise well and get a nice crust.
Pre-Shaping Foundations
Before you shape it for the last time, pre-shaping is key. It builds the dough’s strength and gets it ready for its final shape.
- Gently turn out the dough onto a lightly floured surface
- Use a bench scraper to create a loose round shape
- Allow the dough to rest for 20-30 minutes
- Prevent sticking by using minimal flour
Precision in Final Shaping
Getting the final shape right is crucial for a perfect sourdough sandwich loaf. You need to make the surfaces smooth and the edges tight. This helps it rise well and keeps the crumb right.
- Gently flatten the pre-shaped dough
- Fold edges toward the center
- Roll the dough into a tight cylinder
- Pinch seams to seal
Pro tip: Consistent pressure and gentle handling are key to achieving a beautiful sourdough sandwich loaf that looks and tastes professional.
Proofing Times and Temperature Control
Mastering the proofing process is key to making perfect sourdough bread. Proofing is the last rising stage that adds flavor and texture. The right temperature and timing are crucial for success.
The proofing environment greatly affects your sourdough’s taste and texture. Bakers use two main proofing methods:
- Room Temperature Proofing: Quick and easy
- Cold Proofing: Slower for deeper flavors
Temperature is very important in sourdough bread making. Warmer places make fermentation faster, while cooler ones slow it down. The best proofing temperature is between 70-75°F (21-24°C).
| Proofing Method | Temperature Range | Approximate Time |
|---|---|---|
| Room Temperature | 70-75°F | 4-6 hours |
| Cold Proofing | 38-45°F | 12-18 hours |
Look for signs during proofing. A good dough is puffy, light, and springs back when pressed. Too long and it loses shape, too short and it’s dense.
Home bakers should try different proofing times. Every starter and kitchen is different. Being patient is essential for perfecting your sourdough.
Scoring Patterns and Baking Instructions
Turning your french bread sourdough into a masterpiece needs two key steps: scoring and baking. These steps make the bread look great and control how it grows. They also help create a beautiful crust.
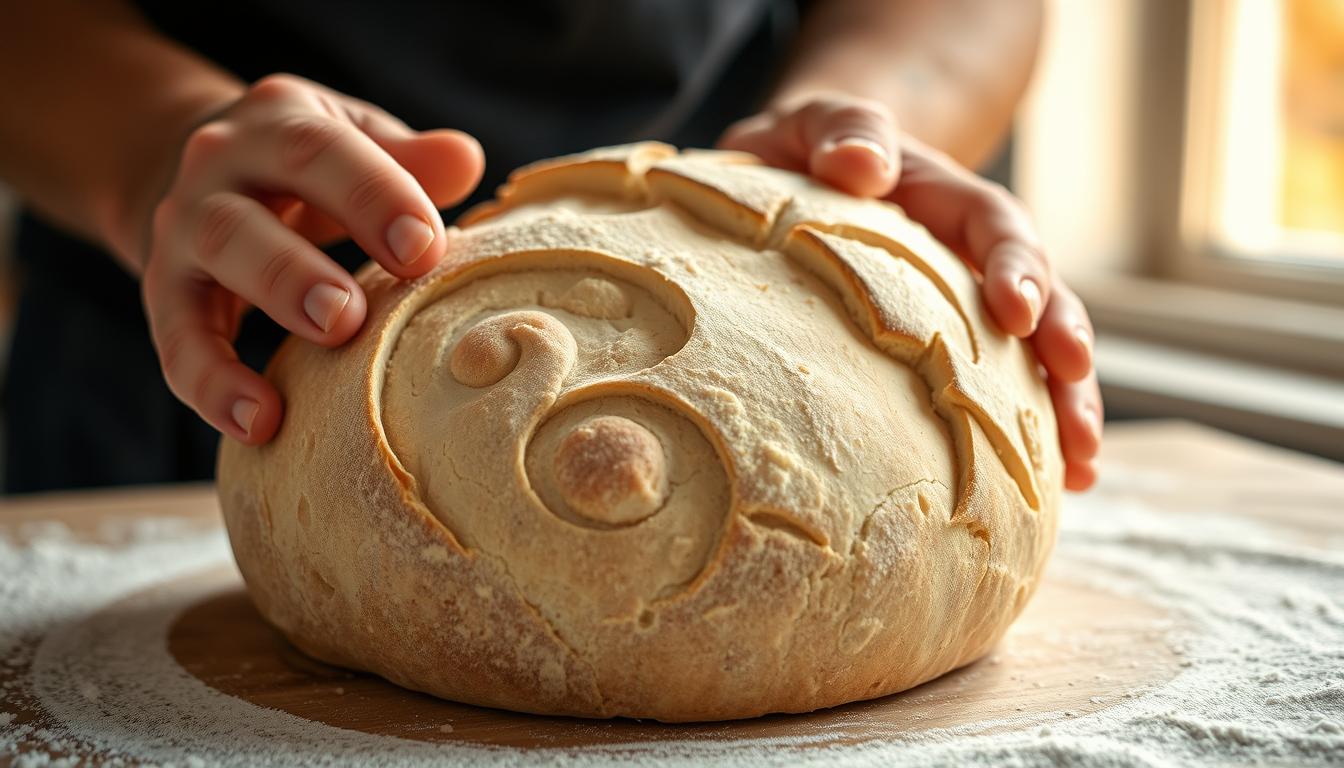
Scoring your sourdough bread is all about precision and creativity. The right cuts can change how your bread rises and looks in the oven.
Basic Scoring Designs
Learn these basic scoring patterns to improve your bread-making:
- Single Slash: A classic straight cut down the center of the loaf
- Wheat Stalk: Multiple angled cuts resembling a wheat ear
- Cross Hatch: Diagonal cuts creating a diamond pattern
- Spiral: Circular cuts from the center outward
Dutch Oven Baking Method
The Dutch oven method makes your french bread sourdough amazing. It traps steam and creates a fantastic crust. This method is like having a professional bakery at home.
- Preheat your Dutch oven at 450°F
- Transfer scored dough carefully into the hot pot
- Cover with lid for first 25 minutes
- Remove lid for final 15-20 minutes of baking
Your perfectly scored and baked sourdough will have a crisp outside and a soft inside. It will show off your new bread-making skills.
Troubleshooting Common Sourdough Problems
Every beginner sourdough recipe has its own challenges. Don’t worry if things don’t go as planned. Sourdough baking is an art that needs patience and practice.
Here are some common issues you might face:
- Dense Loaves: Often caused by underproofed dough or not enough gluten development
- Lack of Oven Spring: Can result from a weak starter or wrong proofing temperatures
- Overly Sour Flavor: Typically happens when starter is left too long between feedings
When working on your beginner sourdough recipe, focus on these key factors:
- Starter strength and activity level
- Room temperature during fermentation
- Hydration ratio of your dough
- Kneading and folding techniques
To get better at sourdough, keep a baking journal. Track your ingredients, temperatures, and techniques. This will help you see what works and what needs changing.
Remember: Each sourdough loaf is a learning experience. Embrace the imperfections!
If you keep having trouble with specific issues, try these quick fixes:
- Check your starter’s activity before baking
- Use a kitchen scale for precise measurements
- Maintain consistent room temperature
- Practice proper stretching and folding techniques
With practice, your beginner sourdough recipe will become a reliable, delicious bread you can be proud of.
Storing and Maintaining Your Sourdough Bread
Keeping your homemade sourdough sandwich loaf fresh is key. It’s all about the right storage and care. This way, your bread stays tasty and fresh for days.
- Keep it at room temperature in a bread box or paper bag
- Don’t use plastic bags, as they can make the crust soggy
- Store it cut-side down on a cutting board
- Eat it within 2-3 days for the best taste and texture
Best Storage Practices
Storing your sourdough loaf needs special care. Room temperature is best for short-term storage. Use a cloth bag or bread box for air circulation and to avoid moisture.
Freezing Instructions
Freezing is great for long-term storage. Here’s how to freeze your bread:
- Cool the sourdough loaf completely before freezing
- Wrap it tightly in plastic wrap
- Put it in a freezer-safe bag, removing air
- Freeze for up to three months
Pro tip: When thawing, remove the bread from packaging. Let it come to room temperature naturally. This keeps the crust crisp and the inside soft.
Conclusion
Learning to make simple sourdough is an art. It mixes science, patience, and creativity. You’ve learned how to make a starter and bake bread. Each loaf is a new adventure that gets better with time.
Your sourdough skills will grow as you try new things. You’ll experiment with different flours and how much water to use. This simple recipe is just the start of a fun journey into bread making.
Every baker’s path is unique. Don’t worry if things don’t go right at first. It’s a chance to get better. Enjoy the journey, keep notes, and share your bread with others.
As you keep baking, you’ll understand sourdough’s magic. Keep learning and stay curious. Your sourdough skills will improve with every loaf you make.
FAQ
How long does it take to make a sourdough starter from scratch?
Making a sourdough starter takes about 5-7 days. You need to feed it with flour and water every day. Discard some each day until it’s active and doubles in size fast.
What type of flour is best for beginner sourdough bakers?
Beginners should use all-purpose or bread flour. They have enough protein for good gluten. Start with 80% all-purpose and 20% whole wheat for easier mixing.
How can I tell if my sourdough starter is ready to use?
Your starter is ready when it doubles in size fast and smells sour. The “float test” is a good way to check: if it floats in water, it’s ready.
What equipment do I need to make sourdough bread at home?
You’ll need a big bowl, a digital scale, a bench scraper, and a proofing basket. Also, a Dutch oven or baking stone, a sharp knife, and a thermometer. A stand mixer helps but isn’t needed.
How long does sourdough bread stay fresh?
Homemade sourdough stays fresh for 3-4 days at room temperature. Slice and freeze it for up to 3 months. Always cool it completely before storing.
Why isn’t my sourdough rising properly?
Issues like an inactive starter or wrong water temperature can stop rising. Make sure your starter is active and use warm water. Keep the proofing area warm and knead well.
Can I make a sourdough sandwich loaf instead of an artisan round?
Yes! Shape your dough into a loaf pan for a sandwich loaf. The process is similar, but adjust the proofing and baking times.
How often should I feed my sourdough starter?
Feed your starter daily if you bake often. Store it in the fridge and feed weekly if you bake less. When baking, let it warm up at room temperature for 1-2 days.
What’s the difference between sourdough and regular bread?
Sourdough uses natural yeast for a complex flavor and better digestibility. The long fermentation breaks down gluten and phytic acid, making it easier to digest.
Can I use whole wheat or rye flour in my sourdough?
Yes! Whole wheat and rye flours add flavor and nutrition. Start with 20-30% whole grain flour for beginners. They make your starter and bread more flavorful and nutritious.

