Easy 4-Ingredient Banana Bread
Have you ever stared at those speckled bananas on your counter, wondering if they’re past their prime? Here’s a secret: those soft, sweet fruits hold the key to creating something magical. Imagine transforming them into a warm, comforting treat with just four simple components—no fancy techniques or obscure pantry items required.
This approach redefines simplicity. By using self-rising flour, you skip the hassle of measuring multiple leavening agents. The natural sugars from ripened fruit keep every bite moist without relying on butter or oil. In under an hour, you’ll have a golden-brown loaf ready to fill your kitchen with its irresistible aroma.
What makes this method stand out? Flexibility. Whether you’re craving chocolate chips stirred into the batter or a sprinkle of walnuts on top, personalizing your creation takes mere seconds. It’s perfect for busy mornings, afternoon pick-me-ups, or sharing with loved ones during weekend gatherings.
Cleanup is just as effortless as the process itself. One bowl, minimal utensils, and a straightforward mixing technique mean you’ll spend more time enjoying your homemade delight than scrubbing dishes. Ready to turn those forgotten fruits into your new favorite snack?
Introduction: Discover the Joy of Simple Baking
Baking becomes effortless when you focus on what truly matters: flavor. Minimalist recipes strip away complexity, letting natural sweetness and texture shine. This method works for anyone craving homemade goodness without hours in the kitchen.
What makes this approach work? Every component has a role. Ripe fruit adds moisture, while self-rising flour handles lift and structure. You won’t need specialty tools or advanced skills—just a bowl and a spoon.
| Aspect | Traditional Baking | Simple Baking |
|---|---|---|
| Ingredients | 8-10 items | 4 essentials |
| Time | 45+ minutes prep | 10-minute mixing |
| Skill Level | Intermediate | Beginner-friendly |
This style encourages experimentation. Add nuts, spices, or dark chocolate chips once you master the base recipe. You’ll build confidence to tackle more elaborate projects later.
Cleanup stays quick, leaving you free to enjoy warm slices straight from the oven. Whether you’re new to baking or short on time, simplicity transforms stress into satisfaction.
The Essence of Minimalist Recipes
Simplicity in baking isn’t about lack—it’s about precision. Each component in a minimalist banana bread recipe serves multiple purposes, creating harmony without clutter. Overripe fruit acts as both sweetener and moisture source, while eggs provide structure and richness. Brown sugar deepens flavor, and self-rising flour handles texture and lift effortlessly.
This philosophy teaches you to value every element’s role. Fewer items mean each one must perform perfectly. You’ll notice how natural sweetness outshines artificial additives when distractions disappear.
| Aspect | Minimalist Approach | Conventional Baking |
|---|---|---|
| Core Components | 4 key items | 8+ ingredients |
| Flavor Clarity | Unmasked natural tones | Layered complexity |
| Skill Development | Mastering fundamentals | Advanced techniques |
Choosing quality over quantity becomes second nature. You’ll gravitate toward fresher produce and premium staples, knowing they’ll define the final result. Decision fatigue fades when your options focus on essentials rather than endless variations.
This method also supports sustainable habits. Using pantry staples reduces waste, while streamlined processes conserve energy. As your confidence grows, you’ll appreciate how foundational skills from minimalist recipes transfer to more complex creations.
Ingredients You Need for Your Banana Bread
Your kitchen counter holds hidden potential. Four core components work together to create a tender, flavorful loaf that feels both nostalgic and fresh. Let’s explore why each element matters and how precise measurements elevate your results.
Overripe Bananas, Large Eggs, and Brown Sugar
Dark-spotted fruits are non-negotiable. Their soft texture blends seamlessly into batter, while natural sugars reduce added sweeteners. For best results, use 4 medium bananas (about 1.5 cups mashed).
Room-temperature large eggs bind everything without greasiness. Cold eggs can create uneven mixing, leading to dense spots. Let them sit on the counter for 15 minutes before baking.
Dark brown sugar adds caramel depth. Its moisture content keeps crumb structure soft. Pack it tightly into your measuring cup—this ensures proper sweetness without overpowering the fruit’s flavor.
Self-Rising Flour: The Secret Ingredient
This pantry staple simplifies everything. Pre-mixed leavening agents guarantee consistent rise, while its protein content creates ideal structure. Measure by weight (250g) for accuracy if possible.
| Flour Type | Leavening | Best For |
|---|---|---|
| Self-Rising | Built-in | Quick recipes |
| All-Purpose | Separate | Custom ratios |
Substitutions require adjustments. If using regular flour, add 3 tsp baking powder + 1/4 tsp salt per cup. Stick with self-rising for foolproof results unless dietary needs demand changes.
Proper Equipment and Tools for Success

Great results start with smart preparation. While minimalist recipes simplify ingredient lists, using the right tools ensures consistency and efficiency. Let’s explore how basic kitchen gear elevates your baking experience.
Loaf Pan and Parchment Paper Essentials
Your loaf pan size directly impacts baking time and texture. Choose either an 8.5×4.5-inch or 9.5×5-inch metal pan for optimal heat distribution. These dimensions prevent overflow while allowing even browning.
Always line your pan with parchment paper. This simple step guarantees easy removal and preserves the crust’s integrity. No more scraping stuck edges or sacrificing slices to stubborn corners.
Mixing Bowls, Whisks, and Cooling Racks
A large bowl provides ample space for combining wet and dry components. Use a whisk to blend eggs thoroughly—this creates air pockets for lighter texture. Silicone spatulas help fold ingredients without overmixing.
Cooling racks matter more than you think. Elevating your loaf lets steam escape evenly, preventing sogginess. Pair this with measuring cups for precise ratios every time.
| Tool | Purpose | Necessity |
|---|---|---|
| Food Scale | Flour measurement | Recommended |
| Potato Masher | Fruit preparation | Optional |
| Rubber Spatula | Batter handling | Essential |
Invest in a kitchen scale if possible. Weight-based measurements reduce errors compared to volume-based cups. For banana mashing, forks work fine—but food processors save time for smoother batters.
Understanding the Role of Overripe Bananas
Dark spots on bananas aren’t a flaw—they’re a feature. Those speckled skins signal peak ripeness, unlocking intense sweetness and moisture that yellow fruits can’t match. When mashed, they create a velvety base that eliminates the need for extra fats or sweeteners.
Natural sugars multiply as bananas darken, reducing added sugar requirements. Enzymes break down starches into simpler sugars, deepening the banana flavor while creating complex taste notes. This process also softens the fruit’s texture, making it blend seamlessly into batters and ensuring even distribution throughout the bread.
Frozen bananas work equally well—thaw them completely and drain excess liquid before use. Their high water content acts as a binding agent, working with eggs to maintain structure without dryness. This natural approach makes them the star ingredient in your recipe.
Don’t discard fruit that’s turned brown. This approach not only enhances flavor but also gives new life to produce that might otherwise be tossed. The darker they become, the more pronounced their sweetness—perfect for creating moist, flavorful bread every time.
Using Self-Rising Flour to Simplify Your Recipe

What if one pantry staple could replace three separate ingredients? Self-rising flour does exactly that—combining flour, baking powder, and salt in precise ratios. This triple-action ingredient streamlines your prep while ensuring reliable results every time.
No more balancing teaspoons of leavening agents. Professional bakers agree:
“Pre-mixed formulas remove variables that cause uneven rise or dense textures.”
Yourbread recipebenefits from consistent aeration, creating that perfect golden dome without last-minute adjustments.
| Option | Components | Prep Time |
|---|---|---|
| Self-Rising Flour | All-in-one | 0 minutes |
| DIY Substitute | 3 items to measure | 2+ minutes |
Need substitutions? Combine 1 cup all-purpose flour with 2 tsp baking powder and ½ tsp salt. While effective, this method adds steps—and room for error—compared to using ready-made self-rising flour.
The magic lies in texture. Commercial blends use finely milled grains that absorb moisture evenly. This creates a tender crumb that’s substantial without feeling heavy. Your final product stays moist for days rather than drying out.
Simplify your process further by measuring cups self-rising flour directly into your mixing bowl. Fewer utensils mean quicker cleanup and more time to enjoy warm slices fresh from the oven. Modern convenience meets classic flavor—no expertise required.
Mixing the Batter: A Step-by-Step Guide
Mastering the mixing process ensures your final product achieves the ideal balance of moisture and structure. This stage transforms individual components into a unified batter ready for baking—precision here makes all the difference.
How to Mash and Combine Ingredients
Begin with softened fruit in your largest bowl. Use a fork or potato masher to break them down until mostly smooth—a few small chunks add pleasant texture. Room-temperature eggs incorporate best when added individually, with thorough mixing after each one.
Stir dark brown sugar into the mixture until no dry pockets remain. Scrape the bowl’s sides to integrate every grain. When adding flour, use a folding motion rather than vigorous stirring. Stop immediately once the last white streaks disappear.
Mistakes to Avoid When Mixing
Overworking the batter ranks as the top error. Gluten development creates toughness, so treat the mixture gently. Never dump all flour at once—gradual incorporation prevents clumping.
| Correct Actions | Common Errors |
|---|---|
| Folding flour gently | Using electric mixers |
| Accepting small lumps | Scraping bowl excessively |
| Mixing wet/dry separately | Adding cold ingredients |
Remember: a slightly uneven texture bakes out beautifully. Perfectionism during this step often leads to dense results. Trust the process—your patience rewards you with tender slices.
Baking at 350°F: Instructions and Best Practices
Your oven becomes the final collaborator in this simple creation. Set it to 350°F (177°C) before mixing your batter—this ensures even heat distribution from the first minute. Position your rack in the lower third of the oven to prevent over-browning while allowing steady airflow around the pan.
Pour the mixture into your prepared loaf pan, filling it no more than three-quarters full. This space allows the batter to rise without spilling over. Bake for 45-60 minutes, rotating the pan halfway through if your oven has hot spots.
Test doneness by inserting a toothpick into the center. A clean pull or a few clinging crumbs signals perfection. Avoid opening the door too early—temperature drops can extend cooking time or create uneven textures.
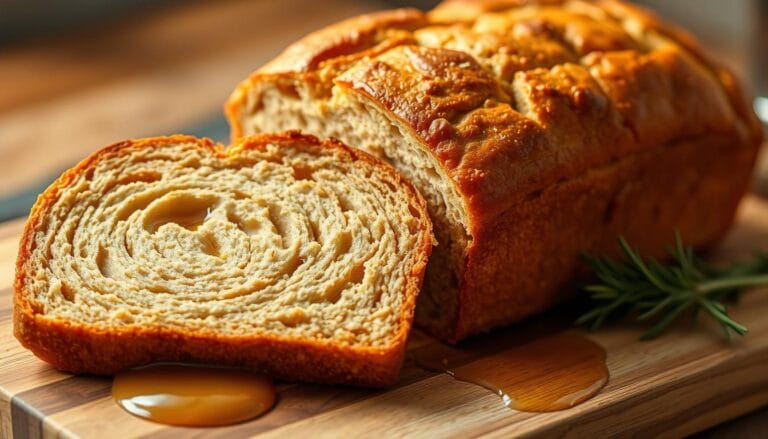
Let the baked good cool in its pan for 10 minutes before transferring to a rack. This brief wait lets the structure firm up, ensuring slices hold their shape. Pair your warm creation with coffee, tea, or a drizzle of honey for instant comfort.


